7. Create the Hello World app
In this task, you will create an app that displays “Hello World” to verify that Android studio is correctly installed, and to learn the basics of developing with Android Studio.
7.1. Create the app project
- Open Android Studio if it is not already opened.
- In the main Welcome to Android Studio window, click Start a new Android Studio project.
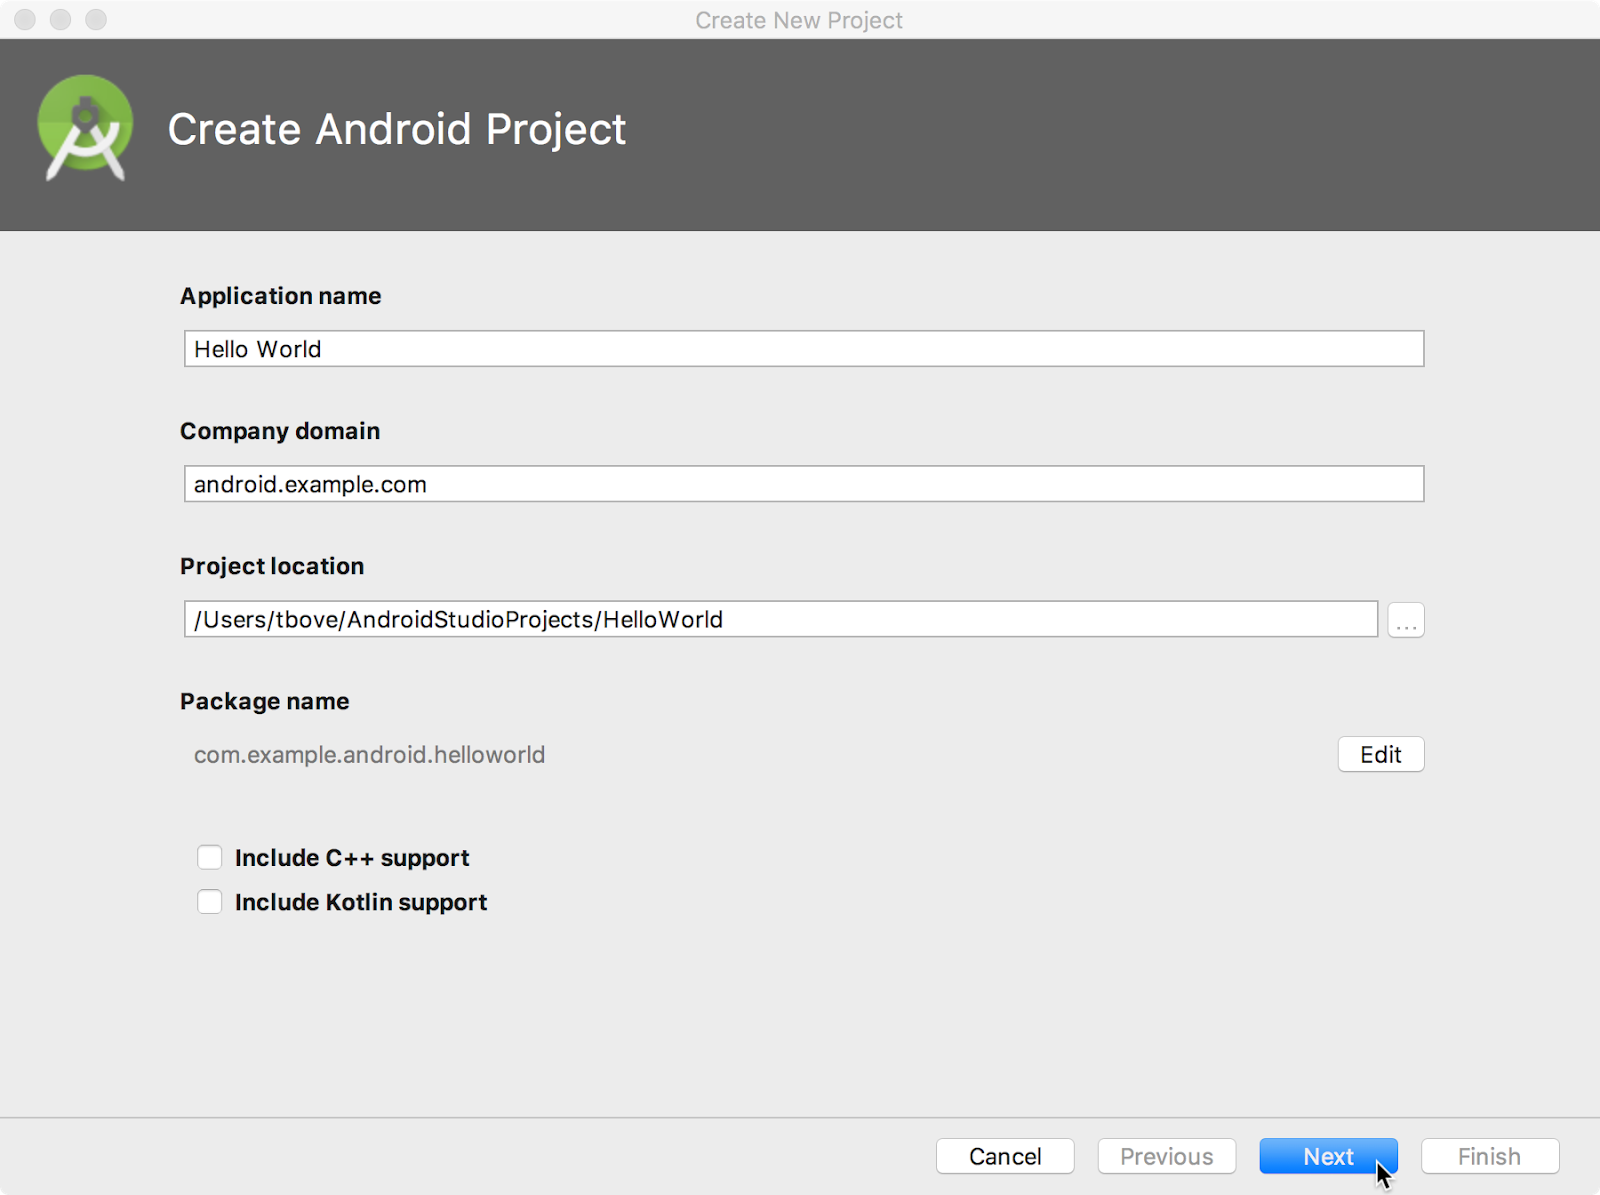
- In the Create Android Project window, enter Hello World for the Application name.
 install
 - Verify that the default Project location is where you want to store your Hello World app and other Android Studio projects, or change it to your preferred directory.
- Accept the default android.example.com for Company Domain, or create a unique company domain.
If you are not planning to publish your app, you can accept the default. Be aware that changing the package name of your app later is extra work.
6.Leave unchecked the options to Include C++ support and Include Kotlin support, and click Next.
7.On the Target Android Devices screen, Phone and Tablet should be selected. Ensure that API 15: Android 4.0.3 IceCreamSandwich is set as the Minimum SDK; if it is not, use the popup menu to set it.
 install
These are the settings used by the examples in the lessons for this course. As of this writing, these settings make your Hello World app compatible with 97% of Android devices active on the Google Play Store.
8.Leave unchecked the Include Instant App support and all other options. Then click Next. If your project requires additional components for your chosen target SDK, Android Studio will install them automatically.
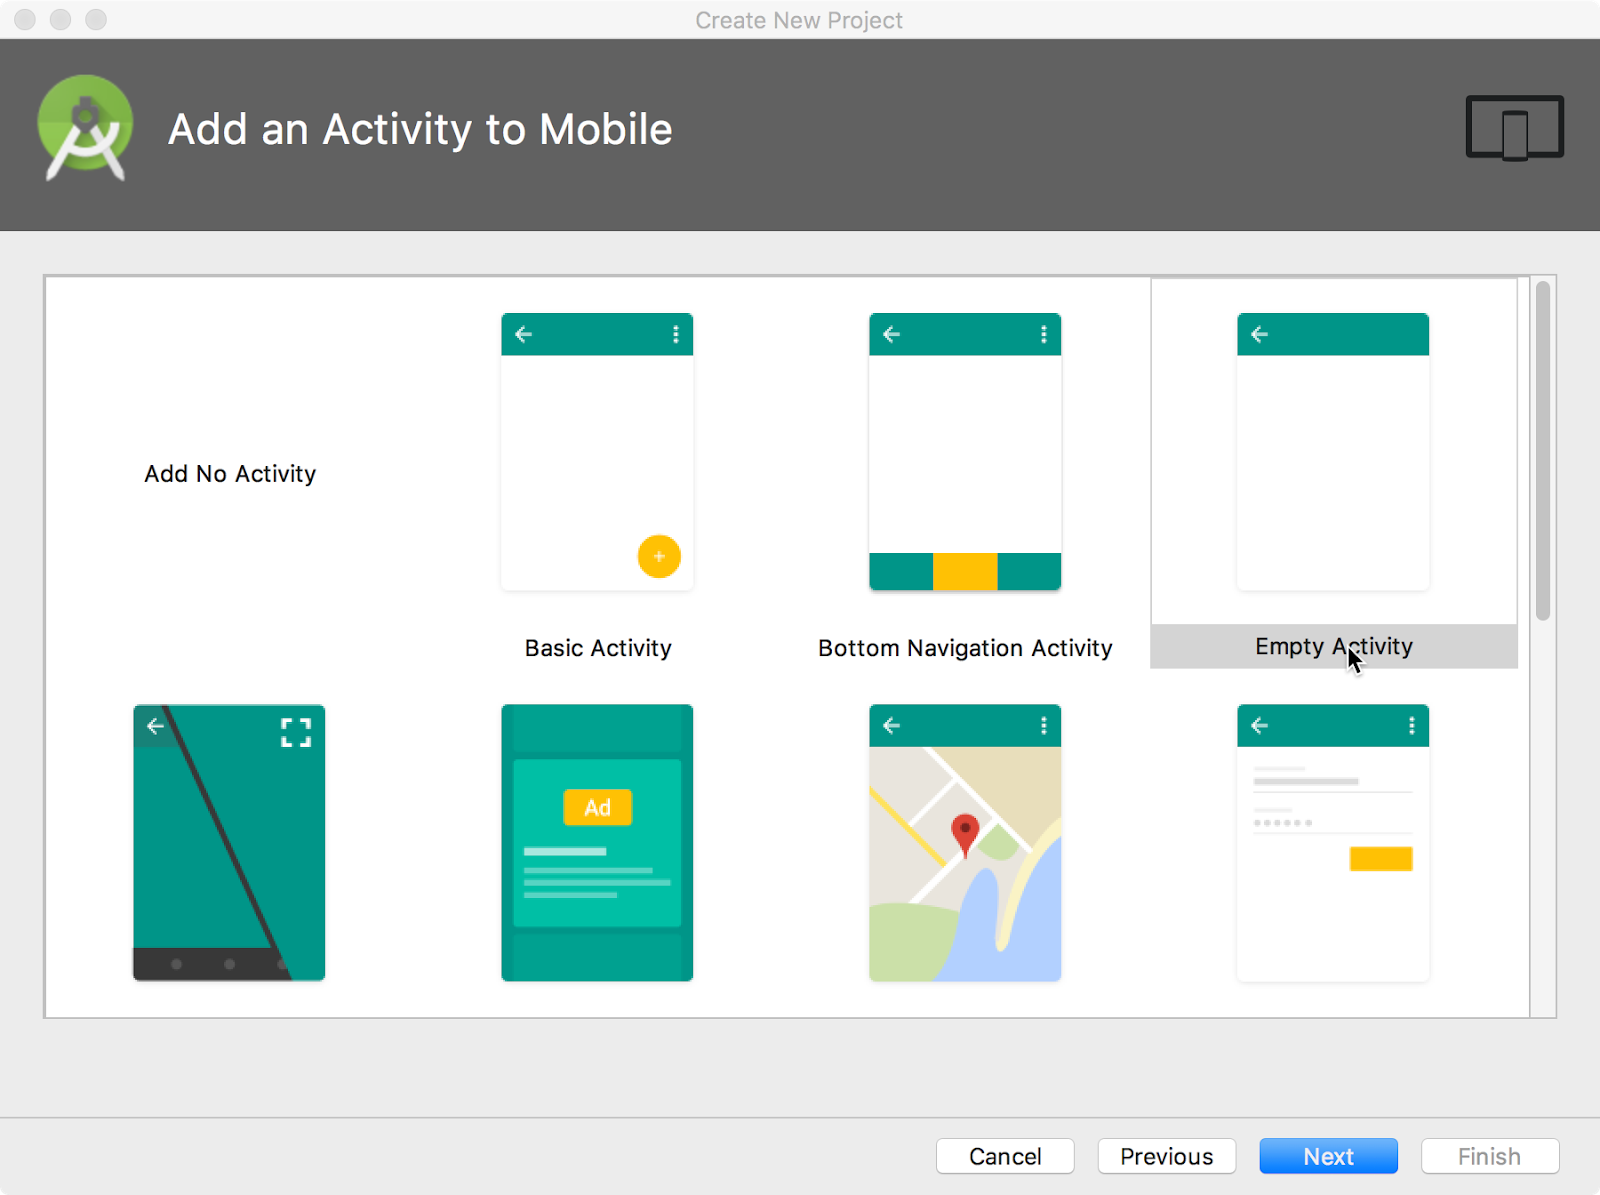
9.The Add an Activity window appears. An Activity is a single, focused thing that the user can do. It is a crucial component of any Android app. An Activity typically has a layout associated with it that defines how UI elements appear on a screen. Android Studio provides Activity templates to help you get started. For the Hello World project, choose Empty Activity as shown below, and click Next.
 install
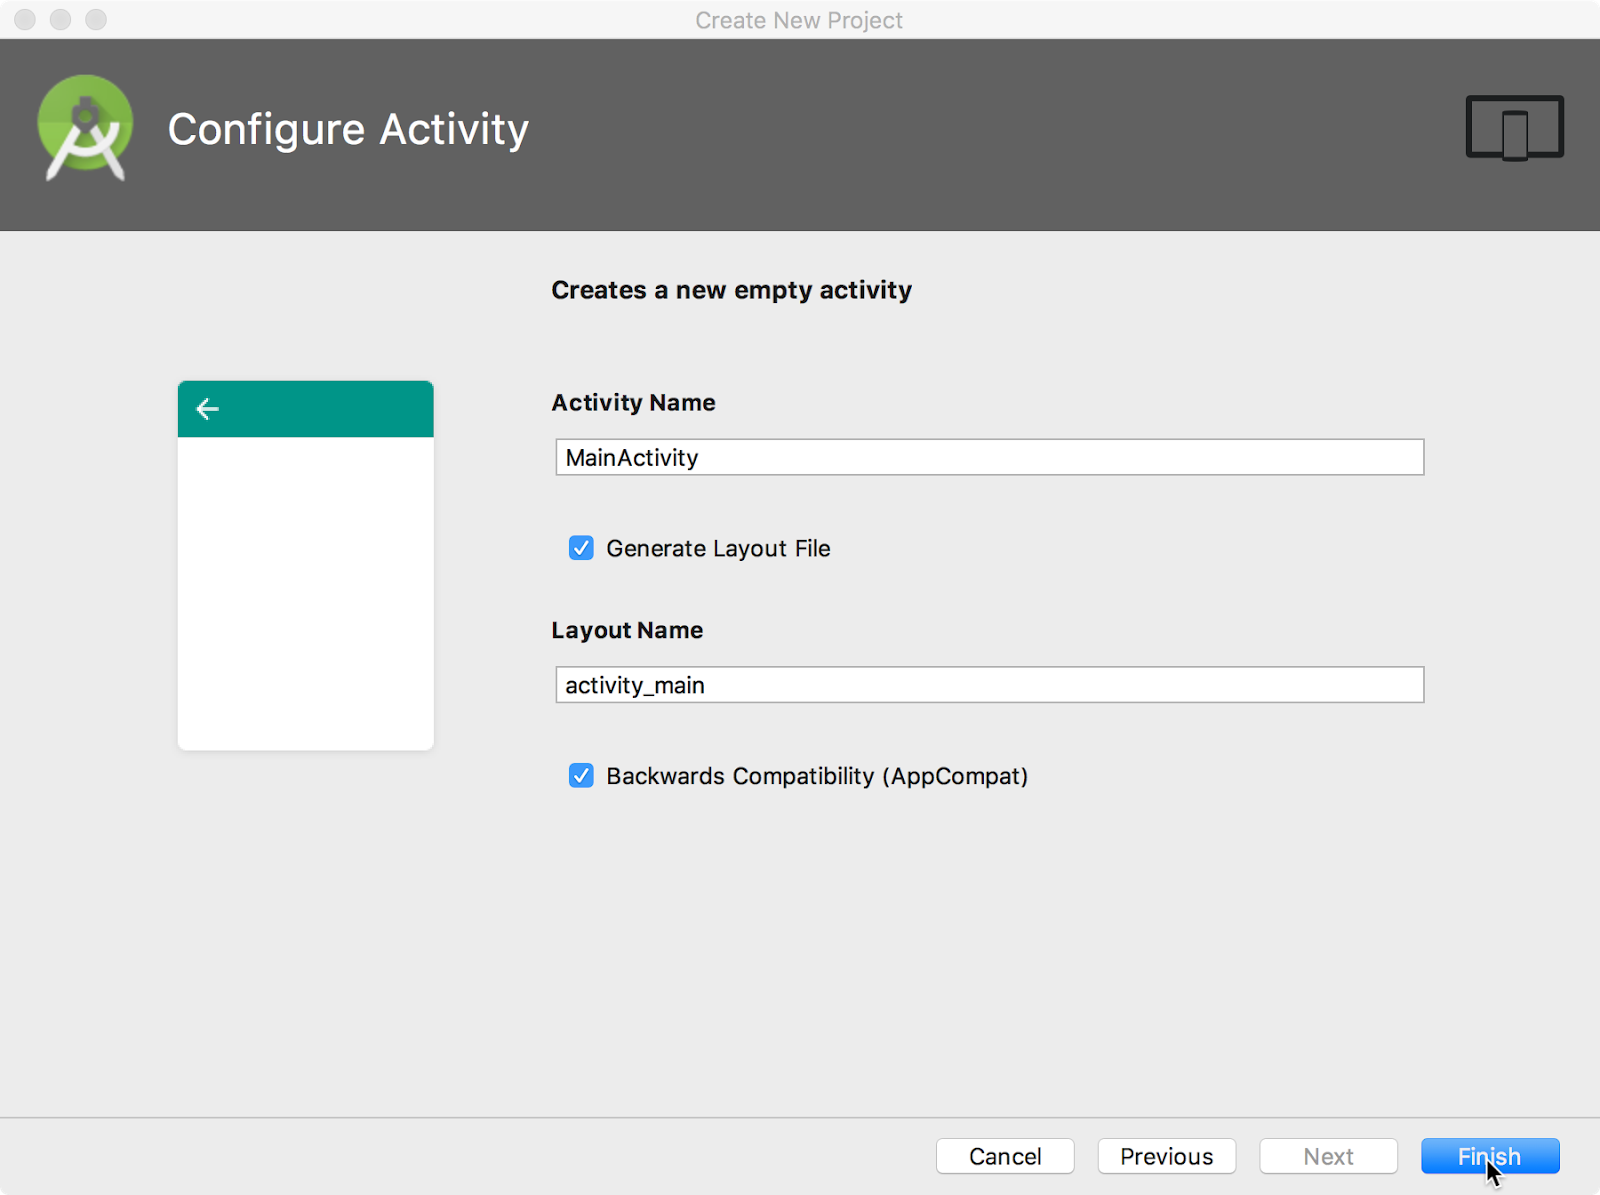
10.The Configure Activity screen appears (which differs depending on which template you chose in the previous step). By default, the empty Activity provided by the template is named MainActivity. You can change this if you want, but this lesson uses MainActivity.
install
11.Make sure that the Generate Layout file option is checked. The layout name by default is activity_main. You can change this if you want, but this lesson uses activity_main.
12.Make sure that the Backwards Compatibility (App Compat) option is checked. This ensures that your app will be backwards-compatible with previous versions of Android.
13.Click Finish.
Android Studio creates a folder for your projects, and builds the project with Gradle (this may take a few moments).
Tip: See the Configure your build developer page for detailed information.
You may also see a “Tip of the day” message with keyboard shortcuts and other useful tips. Click Close to close the message.
The Android Studio editor appears. Follow these steps:
1.Click the activity_main.xml tab to see the layout editor.
2.Click the layout editor Design tab, if not already selected, to show a graphical rendition of the layout as shown below.
 install
3.Click the MainActivity.java tab to see the code editor as shown below.
 install
7.2. Explore the Project > Android pane
In this practical, you will explore how the project is organized in Android Studio.
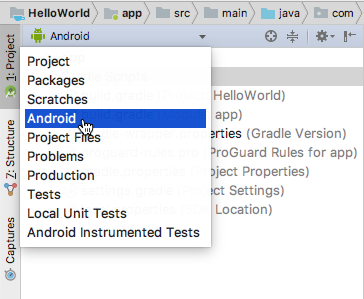
1.If not already selected, click the Project tab in the vertical tab column on the left side of the Android Studio window. The Project pane appears.
2.To view the project in the standard Android project hierarchy, choose Android from the popup menu at the top of the Project pane, as shown below.
 install
Note: This chapter and other chapters refer to the Project pane, when set to Android, as the Project > Android pane.
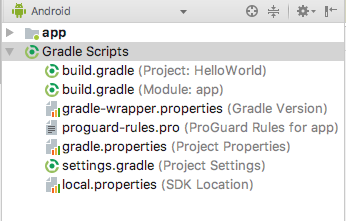
7.3. Explore the Gradle Scripts folder
The Gradle build system in Android Studio makes it easy to include external binaries or other library modules to your build as dependencies.
When you first create an app project, the Project > Android pane appears with the Gradle Scripts folder expanded as shown below.
 install
Follow these steps to explore the Gradle system:
1.If the Gradle Scripts folder is not expanded, click the triangle to expand it. This folder contains all the files needed by the build system.
2.Look for the build.gradle(Project: HelloWorld) file. This is where you’ll find the configuration options that are common to all of the modules that make up your project. Every Android Studio project contains a single, top-level Gradle build file. Most of the time, you won’t need to make any changes to this file, but it’s still useful to understand its contents.
By default, the top-level build file uses the buildscript block to define the Gradle repositories and dependencies that are common to all modules in the project. When your dependency is something other than a local library or file tree, Gradle looks for the files in whichever online repositories are specified in the repositories block of this file. By default, new Android Studio projects declare JCenter and Google (which includes the Google Maven repository) as the repository locations:
    allprojects {
        repositories {
            google()
            jcenter()
        }
    }
3.Look for the build.gradle(Module:app) file.
In addition to the project-level build.gradle file, each module has a build.gradle file of its own, which allows you to configure build settings for each specific module (the HelloWorld app has only one module). Configuring these build settings allows you to provide custom packaging options, such as additional build types and product flavors. You can also override settings in the AndroidManifest.xml file or the top-level build.gradle file.
This file is most often the file to edit when changing app-level configurations, such as declaring dependencies in the dependencies section. You can declare a library dependency using one of several different dependency configurations. Each dependency configuration provides Gradle different instructions about how to use the library. For example, the statement implementation fileTree(dir: 'libs', include: ['*.jar']) adds a dependency of all “.jar” files inside the libs directory.
The following is the build.gradle(Module:app) file for the HelloWorld app:
    apply plugin: 'com.android.application'

    android {
        compileSdkVersion 26
        defaultConfig {
            applicationId "com.example.android.helloworld"
            minSdkVersion 15
            targetSdkVersion 26
            versionCode 1
            versionName "1.0"
            testInstrumentationRunner
                       "android.support.test.runner.AndroidJUnitRunner"
        }
        buildTypes {
            release {
                minifyEnabled false
                proguardFiles
                         getDefaultProguardFile('proguard-android.txt'),
                         'proguard-rules.pro'
            }
        }
    }

    dependencies {
        implementation fileTree(dir: 'libs', include: ['*.jar'])
        implementation 'com.android.support:appcompat-v7:26.1.0'
        implementation
                 'com.android.support.constraint:constraint-layout:1.0.2'
        testImplementation 'junit:junit:4.12'
        androidTestImplementation 'com.android.support.test:runner:1.0.1'
        androidTestImplementation
                  'com.android.support.test.espresso:espresso-core:3.0.1'
    }
4.Click the triangle to close Gradle Scripts.
7.4. Explore the app and res folders
All code and resources for the app are located within the app and res folders.
1.Expand the app folder, the java folder, and the com.example.android.helloworld folder to see the MainActivity java file. Double-clicking the file opens it in the code editor.
 install
The java folder includes Java class files in three subfolders, as shown in the figure above. The com.example.hello.helloworld (or the domain name you have specified) folder contains all the files for an app package. The other two folders are used for testing and described in another lesson. For the Hello World app, there is only one package and it contains MainActivity.java. The name of the first Activity (screen) the user sees, which also initializes app-wide resources, is customarily called MainActivity (the file extension is omitted in the Project > Android pane).
2.Expand the res folder and the layout folder, and double-click the activity_main.xml file to open it in the layout editor.
 install
The res folder holds resources, such as layouts, strings, and images. An Activity is usually associated with a layout of UI views defined as an XML file. This file is usually named after its Activity.
7.5. Explore the manifests folder
The manifests folder contains files that provide essential information about your app to the Android system, which the system must have before it can run any of the app’s code.
1.Expand the manifests folder. 2.Open the AndroidManifest.xml file.
The AndroidManifest.xmL file describes all of the components of your Android app. All components for an app, such as each Activity, must be declared in this XML file. In other course lessons you will modify this file to add features and feature permissions. For an introduction, see App Manifest Overview.