32. Facebook Sign-In Authentication
we will talk about the most trending authentication method of Firebase, i.e., Facebook. Facebook sign-in authentication is quite typical to implement. The users can authenticate with Firebase using their Facebook accounts by integrating Facebook logging into our application.
So let’s see the steps to implement Facebook sign-in authentication one by one.
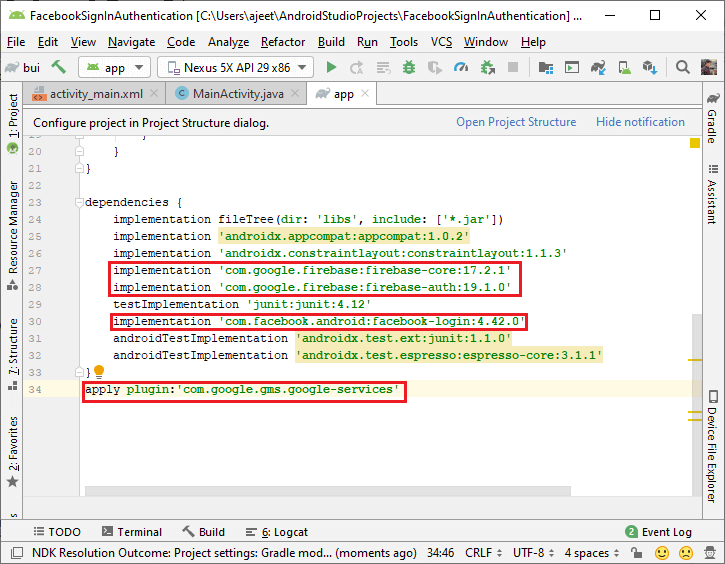
Step 1: In the first step, we will create an Android and Firebase project, and then we will add our Firebase project with our application. Also, add SHA-1 and SHA-256 keys in the Firebase console. After that, add all the required dependencies, i.e., firebase-core, firebase-auth, and plugin in ‘app.build.gradle’ file and classpath in ‘build.gradle’ file.
We will also add the Facebook login dependency in the ‘app.build.gradle’ file’.
 f1
f1
Step 2:
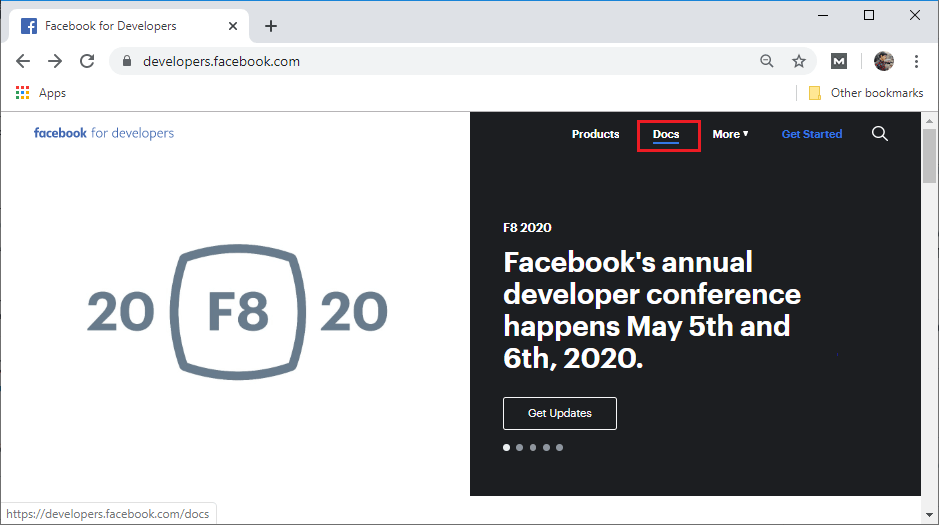
In the next step, we have to create an application in the ‘Facebook for developer’ website. For creating a request, we should have a Facebook account. Login with the Facebook account. Then, go to the Facebook developer site with the help of the following link:
https://developers.facebook.com/
 f2
f2
Once our developer account is logged in, we will click on Docs to move on to the document page.
 f3
f3
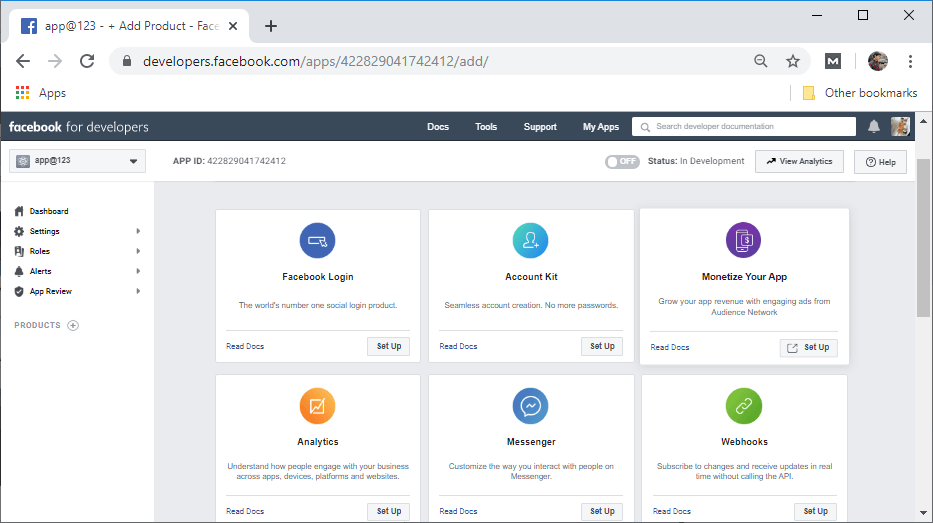
Step 3:
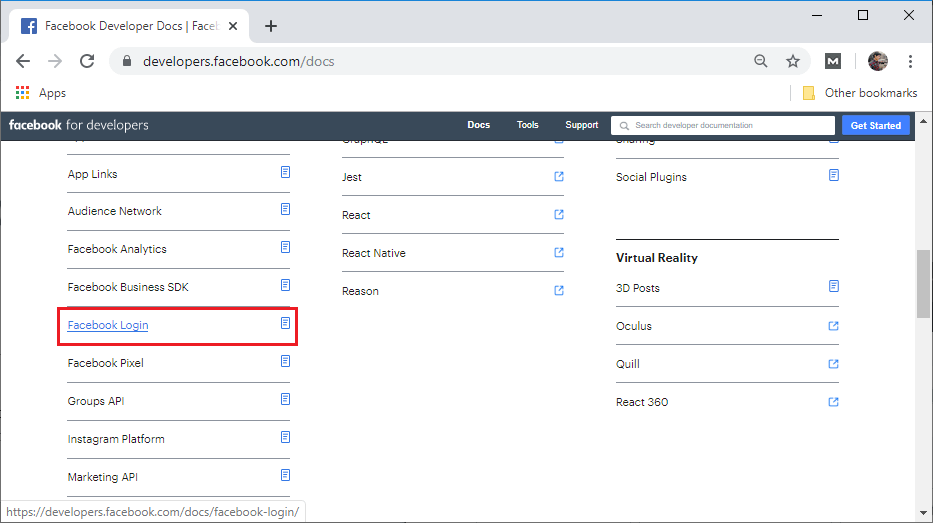
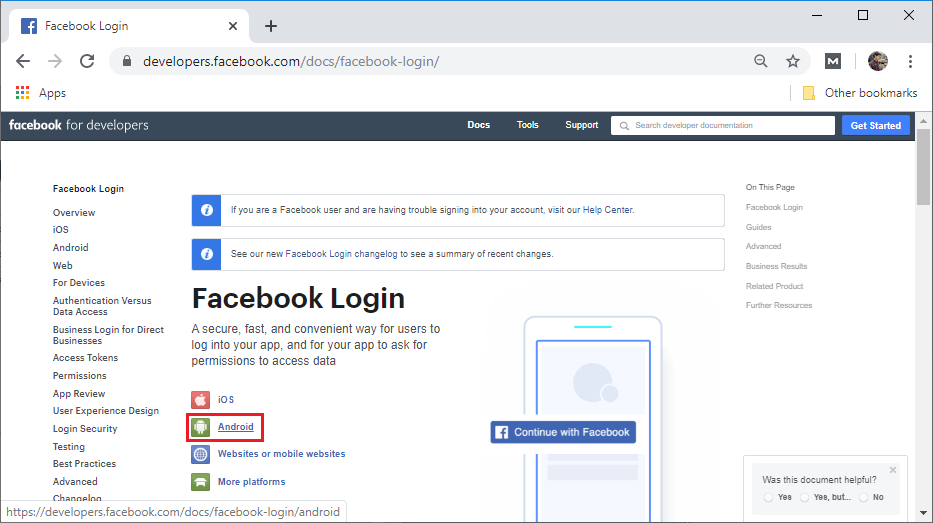
In the document page, we will scroll down and click on the Facebook login. And from the Facebook login page, we will select Android to move an android page from there, we will select an app or create a new app.
 f4
f4
 f5
f5
If we are not a developer, then we have to register as a developer by clicking on Register.
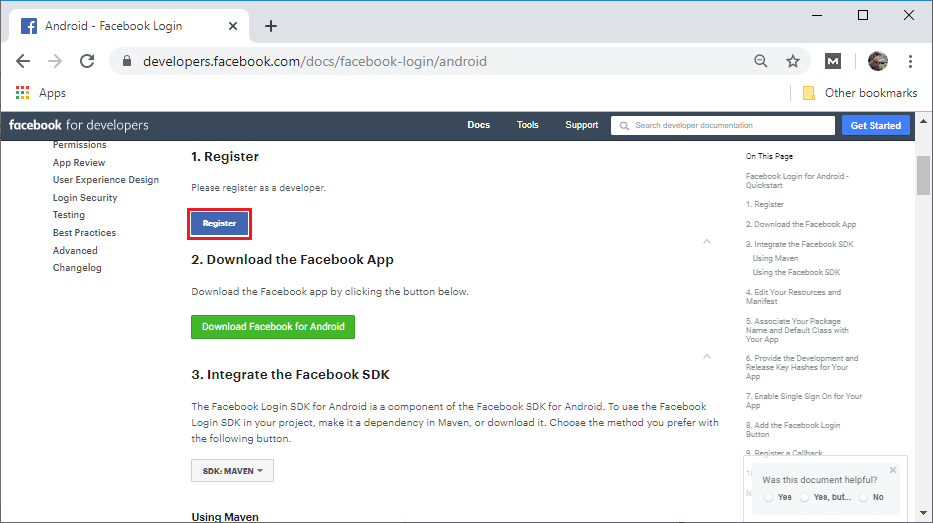 f6
f6
Click on next to register as a Facebook developer.
 f7
f7
After clicking on the next, a new screen will be visible from where select the developer option.
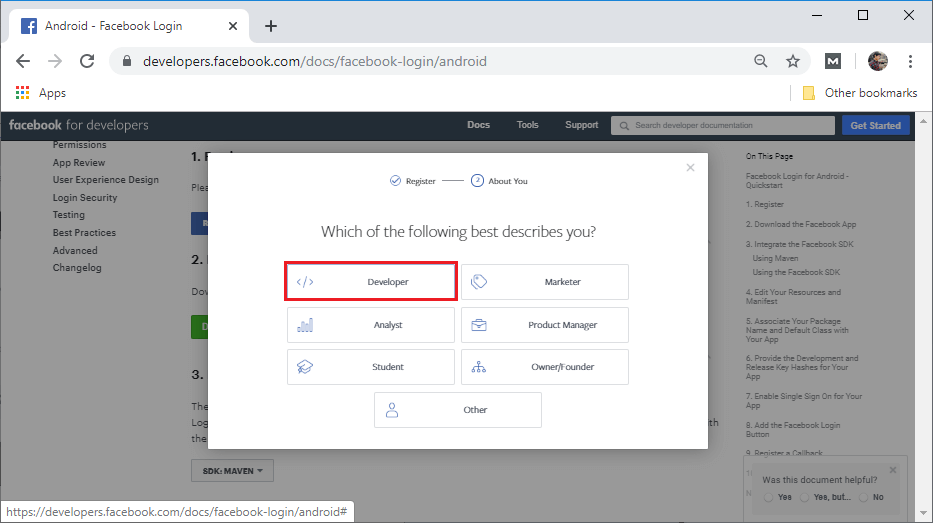 f8
f8
After selecting developer, the welcome page will be opened.
 f9
f9
From the welcome page, select Create First App and give it a name for display and contact email and click on Create App ID.
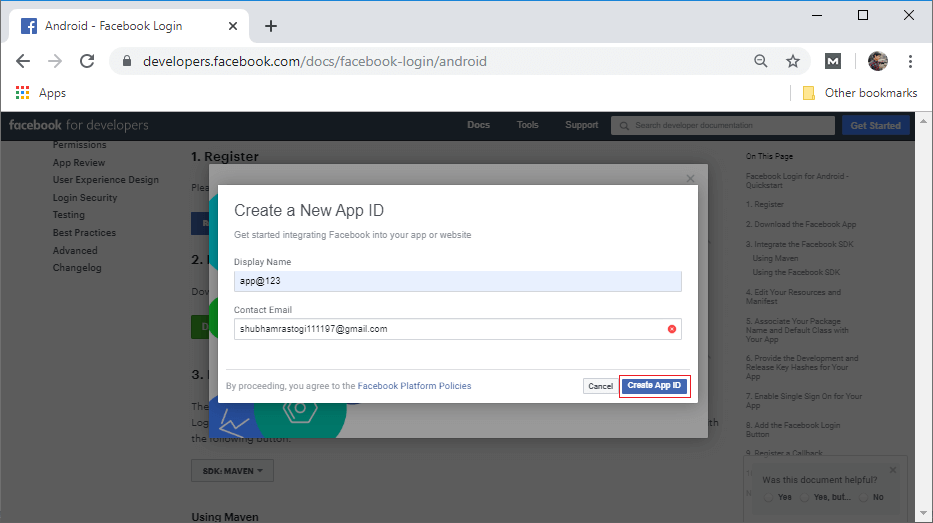 f10
f10
Perform a security check.
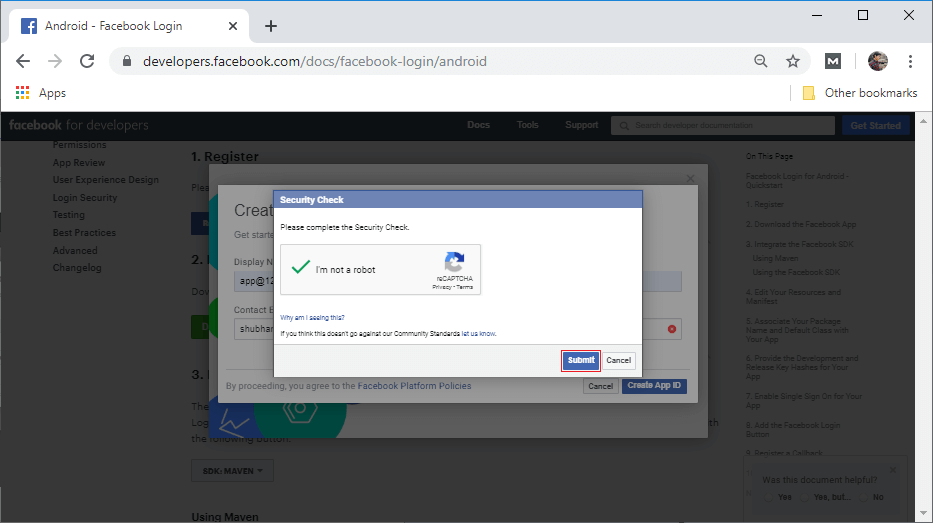 f11
f11
 f12
f12
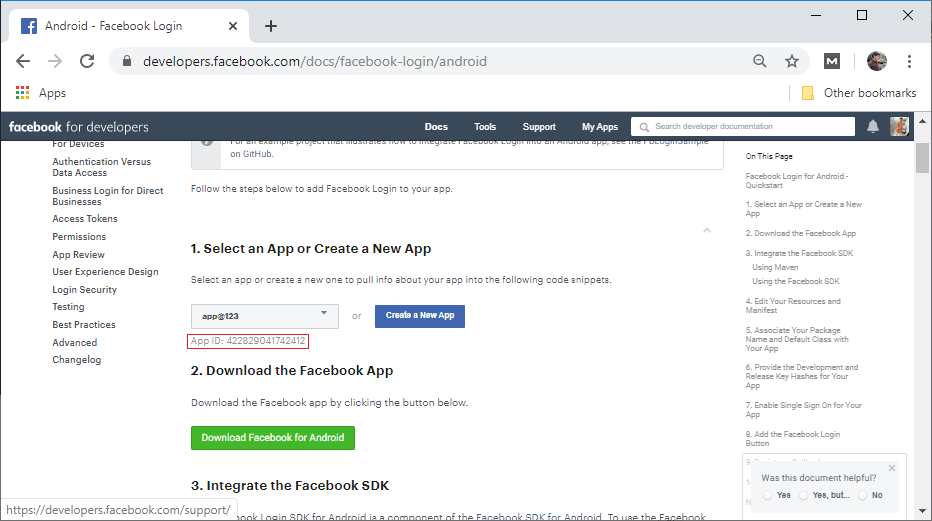
Now, go to Home->Doc->facebook login->android and select the app which we have created before and copied the App ID.
 f13
f13
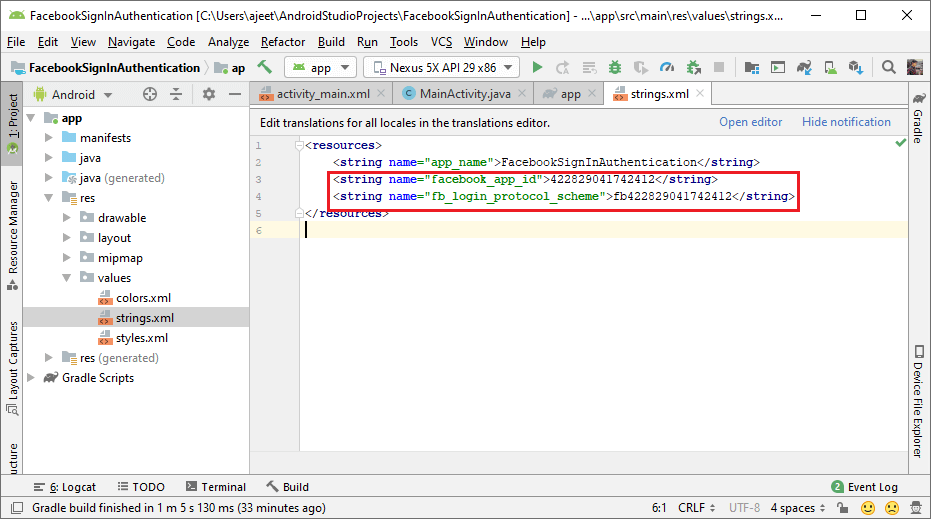
Step 4:
In the next step, we will move to the ‘string.xml’ file of Android Studio and create two strings, i.e., facebook_app_id and fb_login_protocol_scheme. For facebook_app_id, we will paste the app id, which we have copied before, and for fb_login_protocol_scheme, we will add prefix FB in our app_id and use it as a protocol string.
 f14
f14
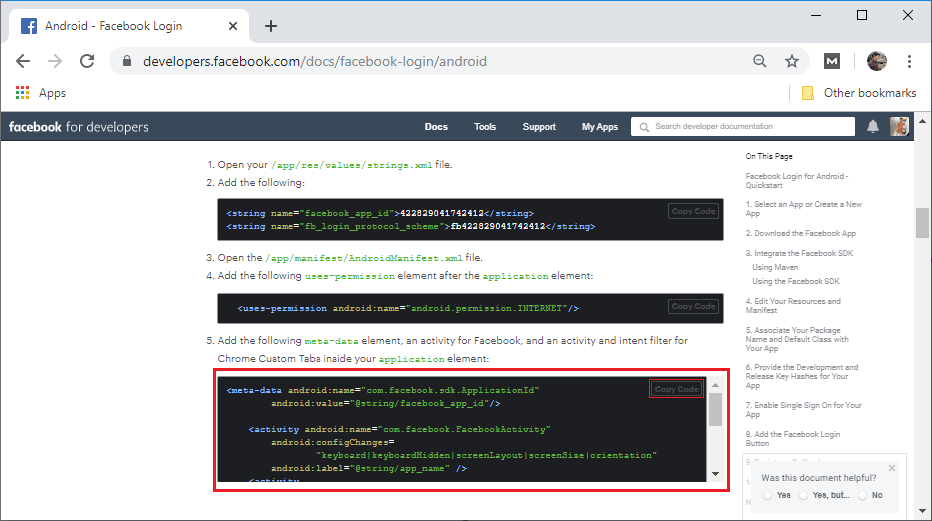
Step 5:
We also need to add permission for the Internet to our Android Manifest file.
 f15
f15
Step 6:
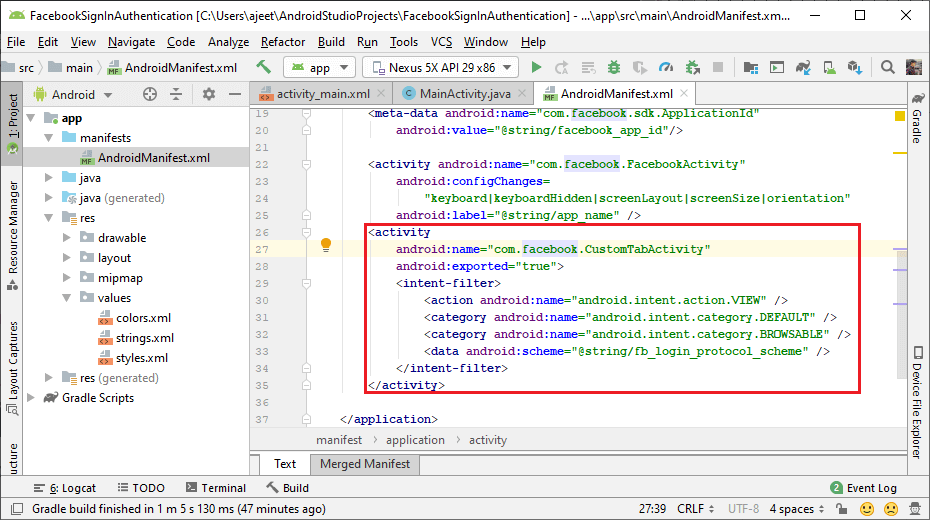
In the next step, we will add the Metadata. For this, we will go to the Facebook developer site and copy the code of step 5.
 f16
f16
After copying the code, we will paste it in Manifest files after the MainActivity code.
 f17
f17
Step 7:
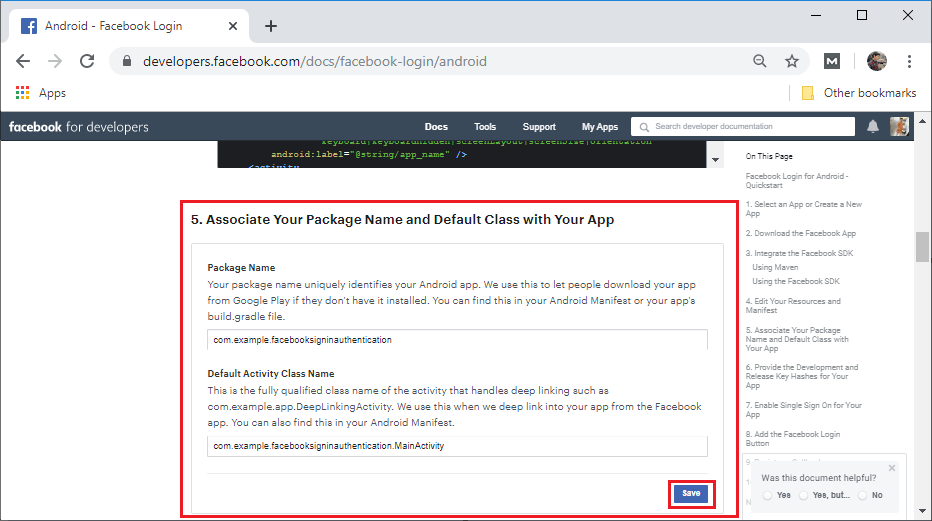
Now, we will associate our package name and default class with our app. So we will add the package name and default activity class name in the developer site.
 f18
f18
Step 8:
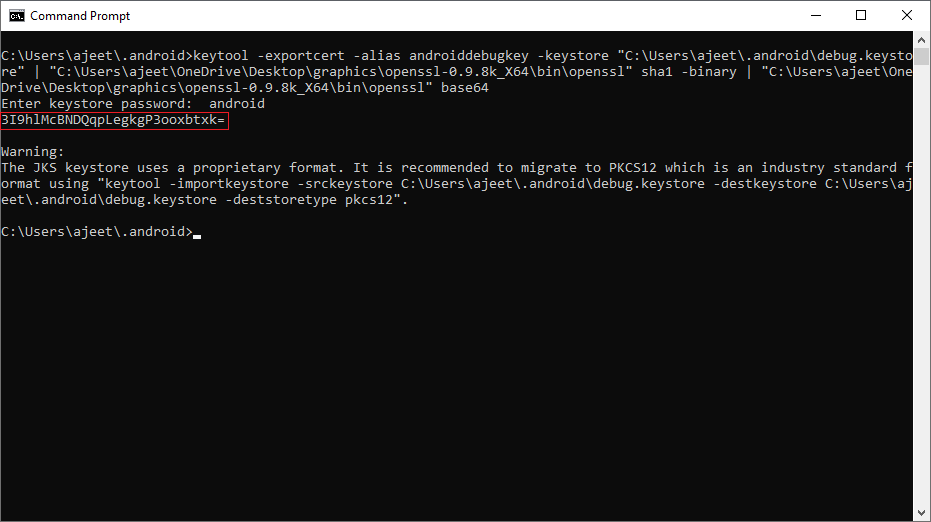
In the next step, we will add the Development Key Hashes for our app. For this, we need openssl open library. If we don’t have this library, then we first have to download the openssl library. And after that we will execute the following command in the command prompt:
 f19
f19
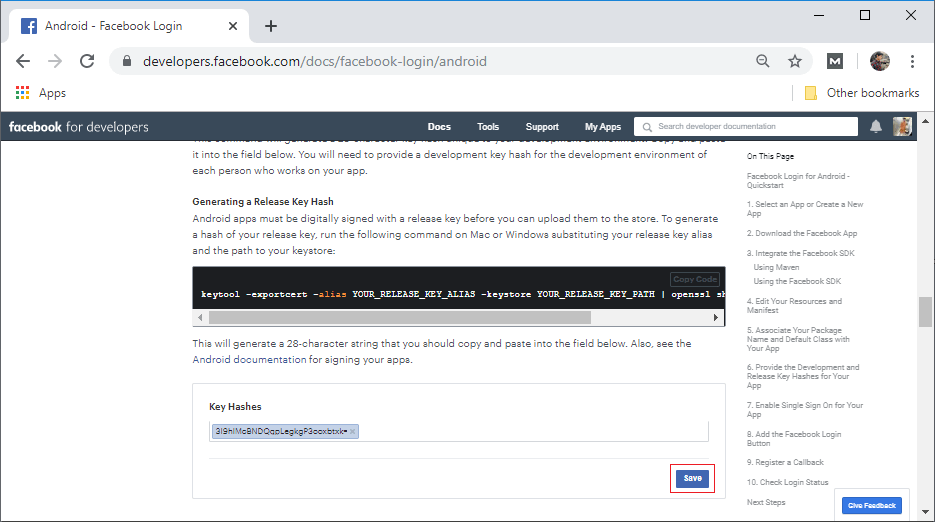
We will copy this key and paste it in the developer site’s Key Hashes
 f20
f20
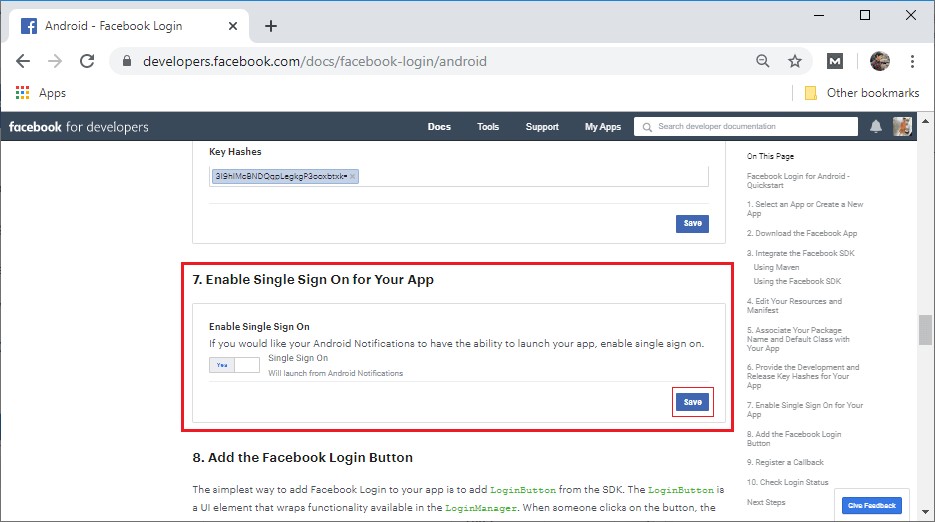
Step 9:
In the next step, we have to enable single sign-on for our app in facebook developer sites.
 f21
f21
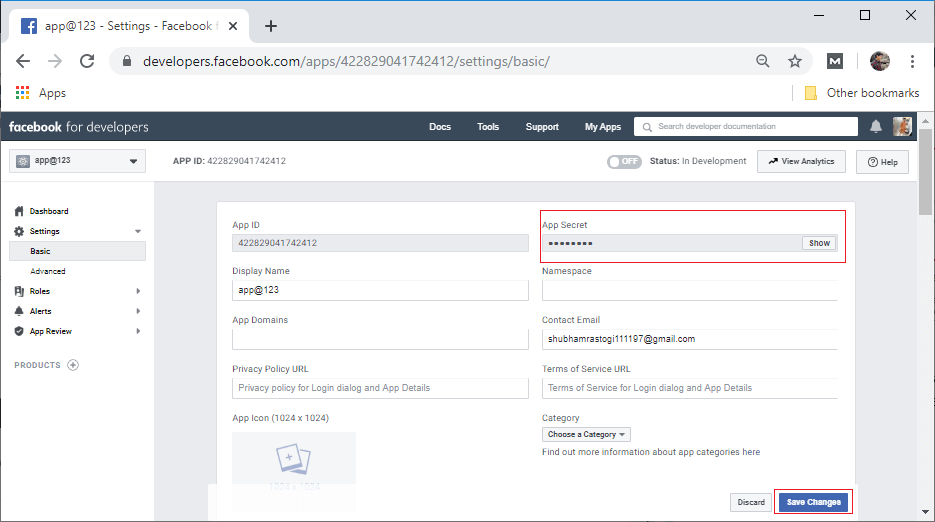
Step 10:
In the next step, we will go to the basic setting of our app in the facebook developer site. And from here, we have to copy the App Secret that will be used in Firebase console.
 f22
f22
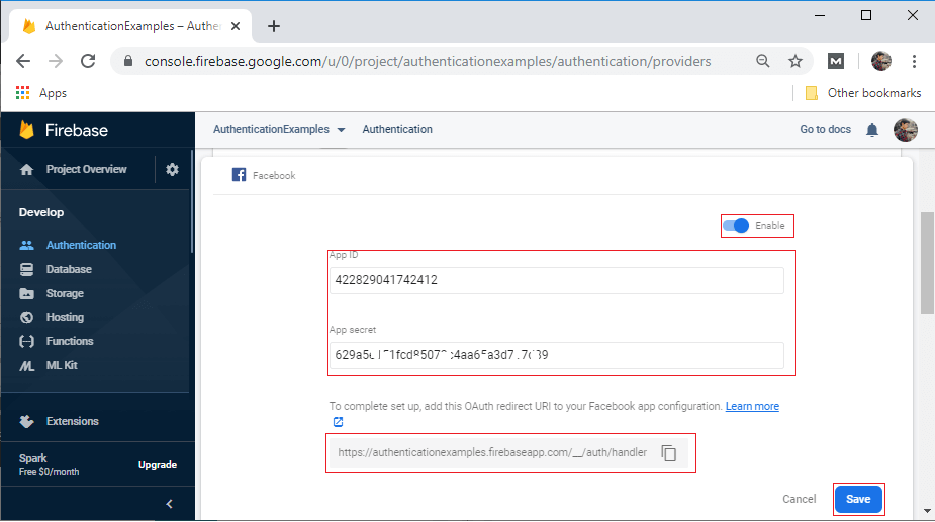
Step 11:
The App Secret, which we have copied from the Facebook developer site, will be pasted in the firebase console. When we enable the Facebook sign-in method, it will ask for the App ID and App Secret and provide OAuth redirect URL, which will be added to our app on the Facebook developer site.
 f23
f23
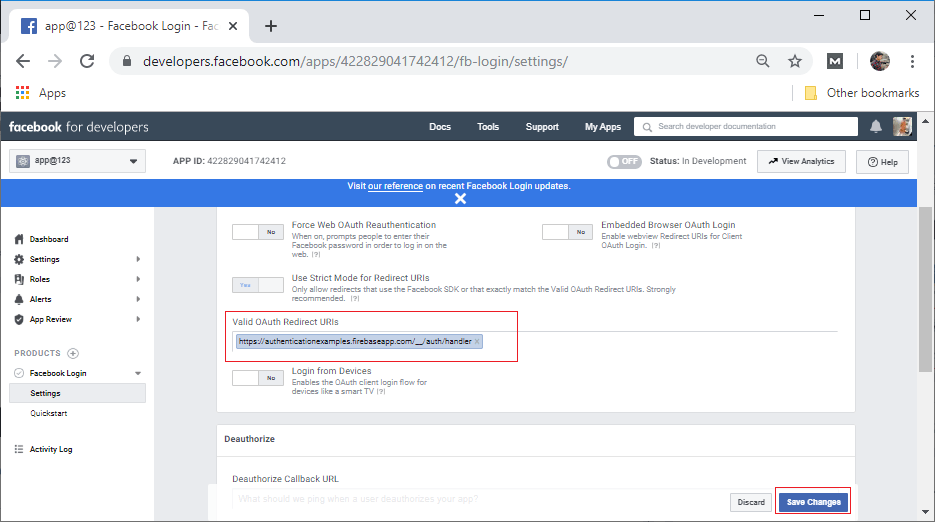
Now, we will go to the Facebook setting page. Here, we will add the OAuth redirect URL to Facebook login settings.
 f24
f24
Step 12:
In the next step, we will create a Facebook login button from the SDK. It is a UI element that wraps functionality available in the login manager.
 f25
f25
Step 13:
In the next step, we will modify our MainActivity.java file to perform the authentication using Facebook in the following way:
public class MainActivity extends AppCompatActivity {

    private static final String TAG = "FacebookLogin";
    private static final int RC_SIGN_IN = 12345;

    private CallbackManager mCallbackManager;

    private FirebaseAuth mAuth;

    @Override
    protected void onCreate(Bundle savedInstanceState) {
        super.onCreate(savedInstanceState);
        setContentView(R.layout.activity_main);

        // Initialize Firebase Auth
        mAuth = FirebaseAuth.getInstance();

        // Initialize Facebook Login button
        mCallbackManager = CallbackManager.Factory.create();

        LoginButton loginButton = findViewById(R.id.login_button);

        loginButton.setReadPermissions("email", "public_profile");
        loginButton.registerCallback(mCallbackManager, new FacebookCallback<LoginResult>() {
            @Override
            public void onSuccess(LoginResult loginResult) {
                Log.d(TAG, "facebook:onSuccess:" + loginResult);
                handleFacebookAccessToken(loginResult.getAccessToken());
            }

            @Override
            public void onCancel() {
                Log.d(TAG, "facebook:onCancel");
            }

            @Override
            public void onError(FacebookException error) {

            }

        });
    }

    @Override
    public void onStart() {
        super.onStart();

        // Checking if the user is signed in (non-null) and update UI accordingly.
        FirebaseUser currentUser = mAuth.getCurrentUser();

        if (currentUser != null) {
            Log.d(TAG, "Currently Signed in: " + currentUser.getEmail());
            Toast.makeText(MainActivity.this, "Currently Logged in: " + currentUser.getEmail(), Toast.LENGTH_LONG).show();
        }
    }
    @Override
    protected void onActivityResult(int requestCode, int resultCode, Intent data) {
        super.onActivityResult(requestCode, resultCode, data);

        // The activity result pass back to the Facebook SDK
        mCallbackManager.onActivityResult(requestCode, resultCode, data);
    }

    private void handleFacebookAccessToken(AccessToken token) {
        Log.d(TAG, "handleFacebookAccessToken:" + token);

        AuthCredential credential = FacebookAuthProvider.getCredential(token.getToken());

        mAuth.signInWithCredential(credential)
                .addOnCompleteListener(this, new OnCompleteListener<AuthResult>() {
                    @Override
                    public void onComplete(@NonNull Task<AuthResult> task) {
                        if (task.isSuccessful()) {
                            // Sign in success, UI will update with the signed-in user's information
                            Log.d(TAG, "signInWithCredential:success");
                            FirebaseUser user = mAuth.getCurrentUser();
                            Toast.makeText(MainActivity.this, "Authentication Succeeded.", Toast.LENGTH_SHORT).show();
                        } else {
                            // If sign-in fails, a message will display to the user.
                            Log.w(TAG, "signInWithCredential:failure", task.getException());
                            Toast.makeText(MainActivity.this, "Authentication failed.", Toast.LENGTH_SHORT).show();
                        }
                    }
                });
    }
}
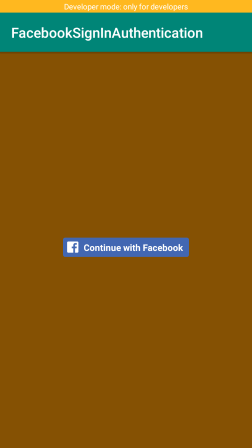
Output:
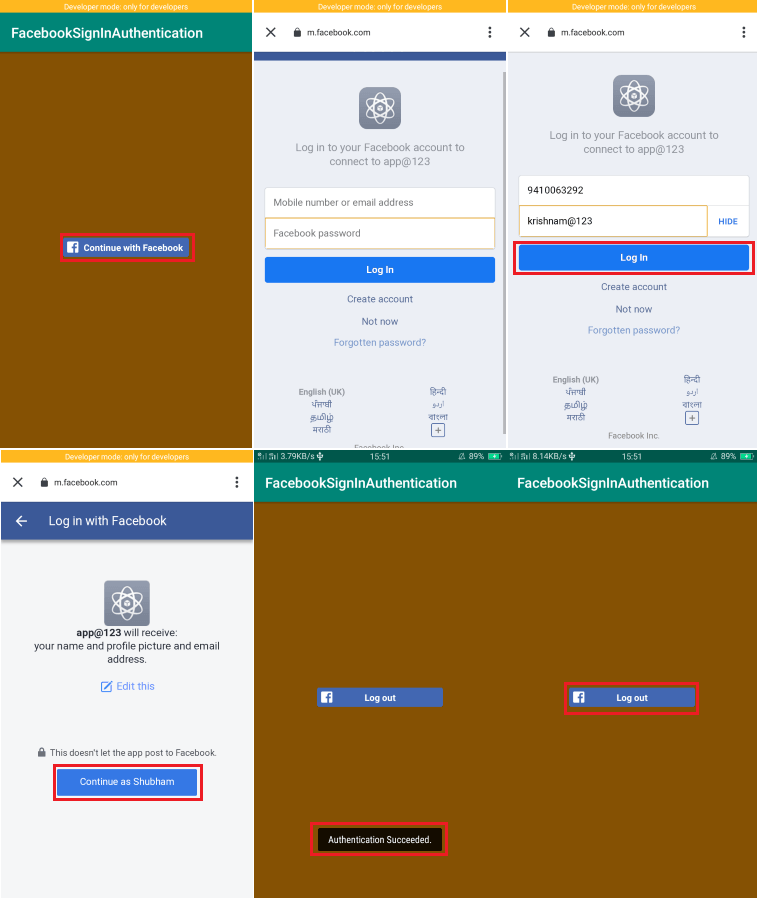 f26
f26
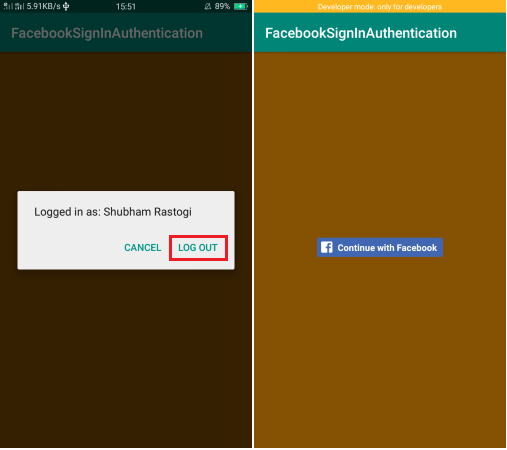 f28
f28
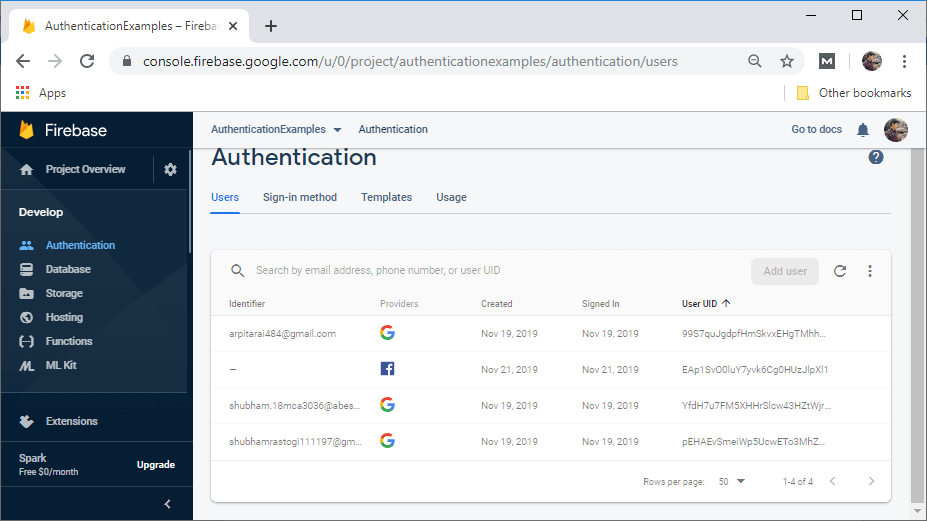 f27
f27